


introduction
If you’re anything like me in the sense that you:
a) love mocking up book covers for fun but
b) is hopeless with advanced photoshopping/can’t create digital art for your life,
then read on! This post is for you! There might seem like many steps at first glance, but they are all simple to follow.
I want to stress I am by NO MEANS a photoshop/book cover designer expert, and there are probably more advanced techniques out there. I’m simply offering a solution that worked for me and my needs (namely, creating presentable mock covers for a website and/or to surprise a CP ♥️)
For those of you who don’t know me well, I love procrastinating expanding my creative horizons every once in a while despite the fact the familial artistic gene seemed to have skipped me. Luckily, armed with iPhone apps, YouTube, and good ol’ photoshop, a little pinch of creativity can go a long way.
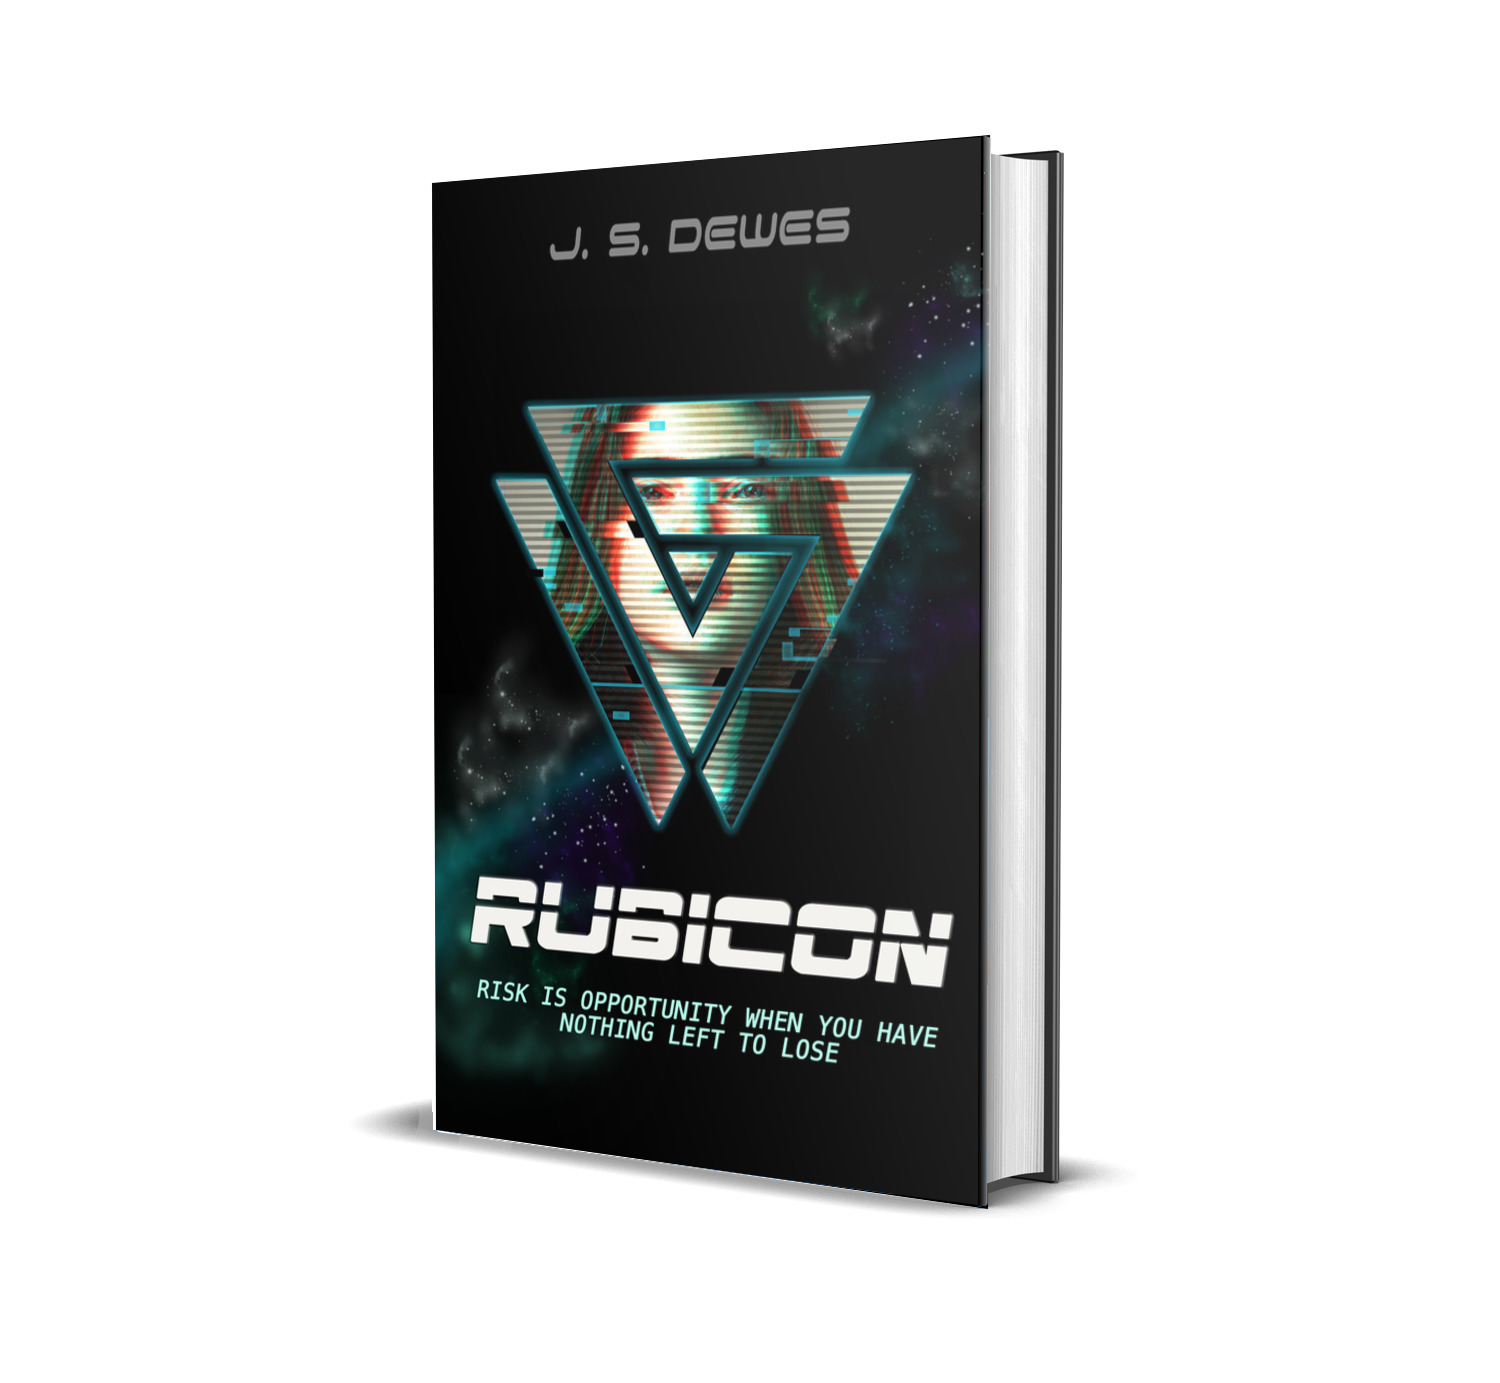
In this post, I’ll be going over the steps I took to create the RUBICON cover for the amazing J. S. Dewes as a fun project. The skills/hacks/steps used in the process can be easily remixed to create various covers. The post will go over:
-Creating a “glitch” effect from a normal photo
-Painting a galaxy/nebula in Photoshop
-Giving fonts a metallic effect
The two programs I used are:
-Photoshop
-PicsArt (phone app–I used the free version)
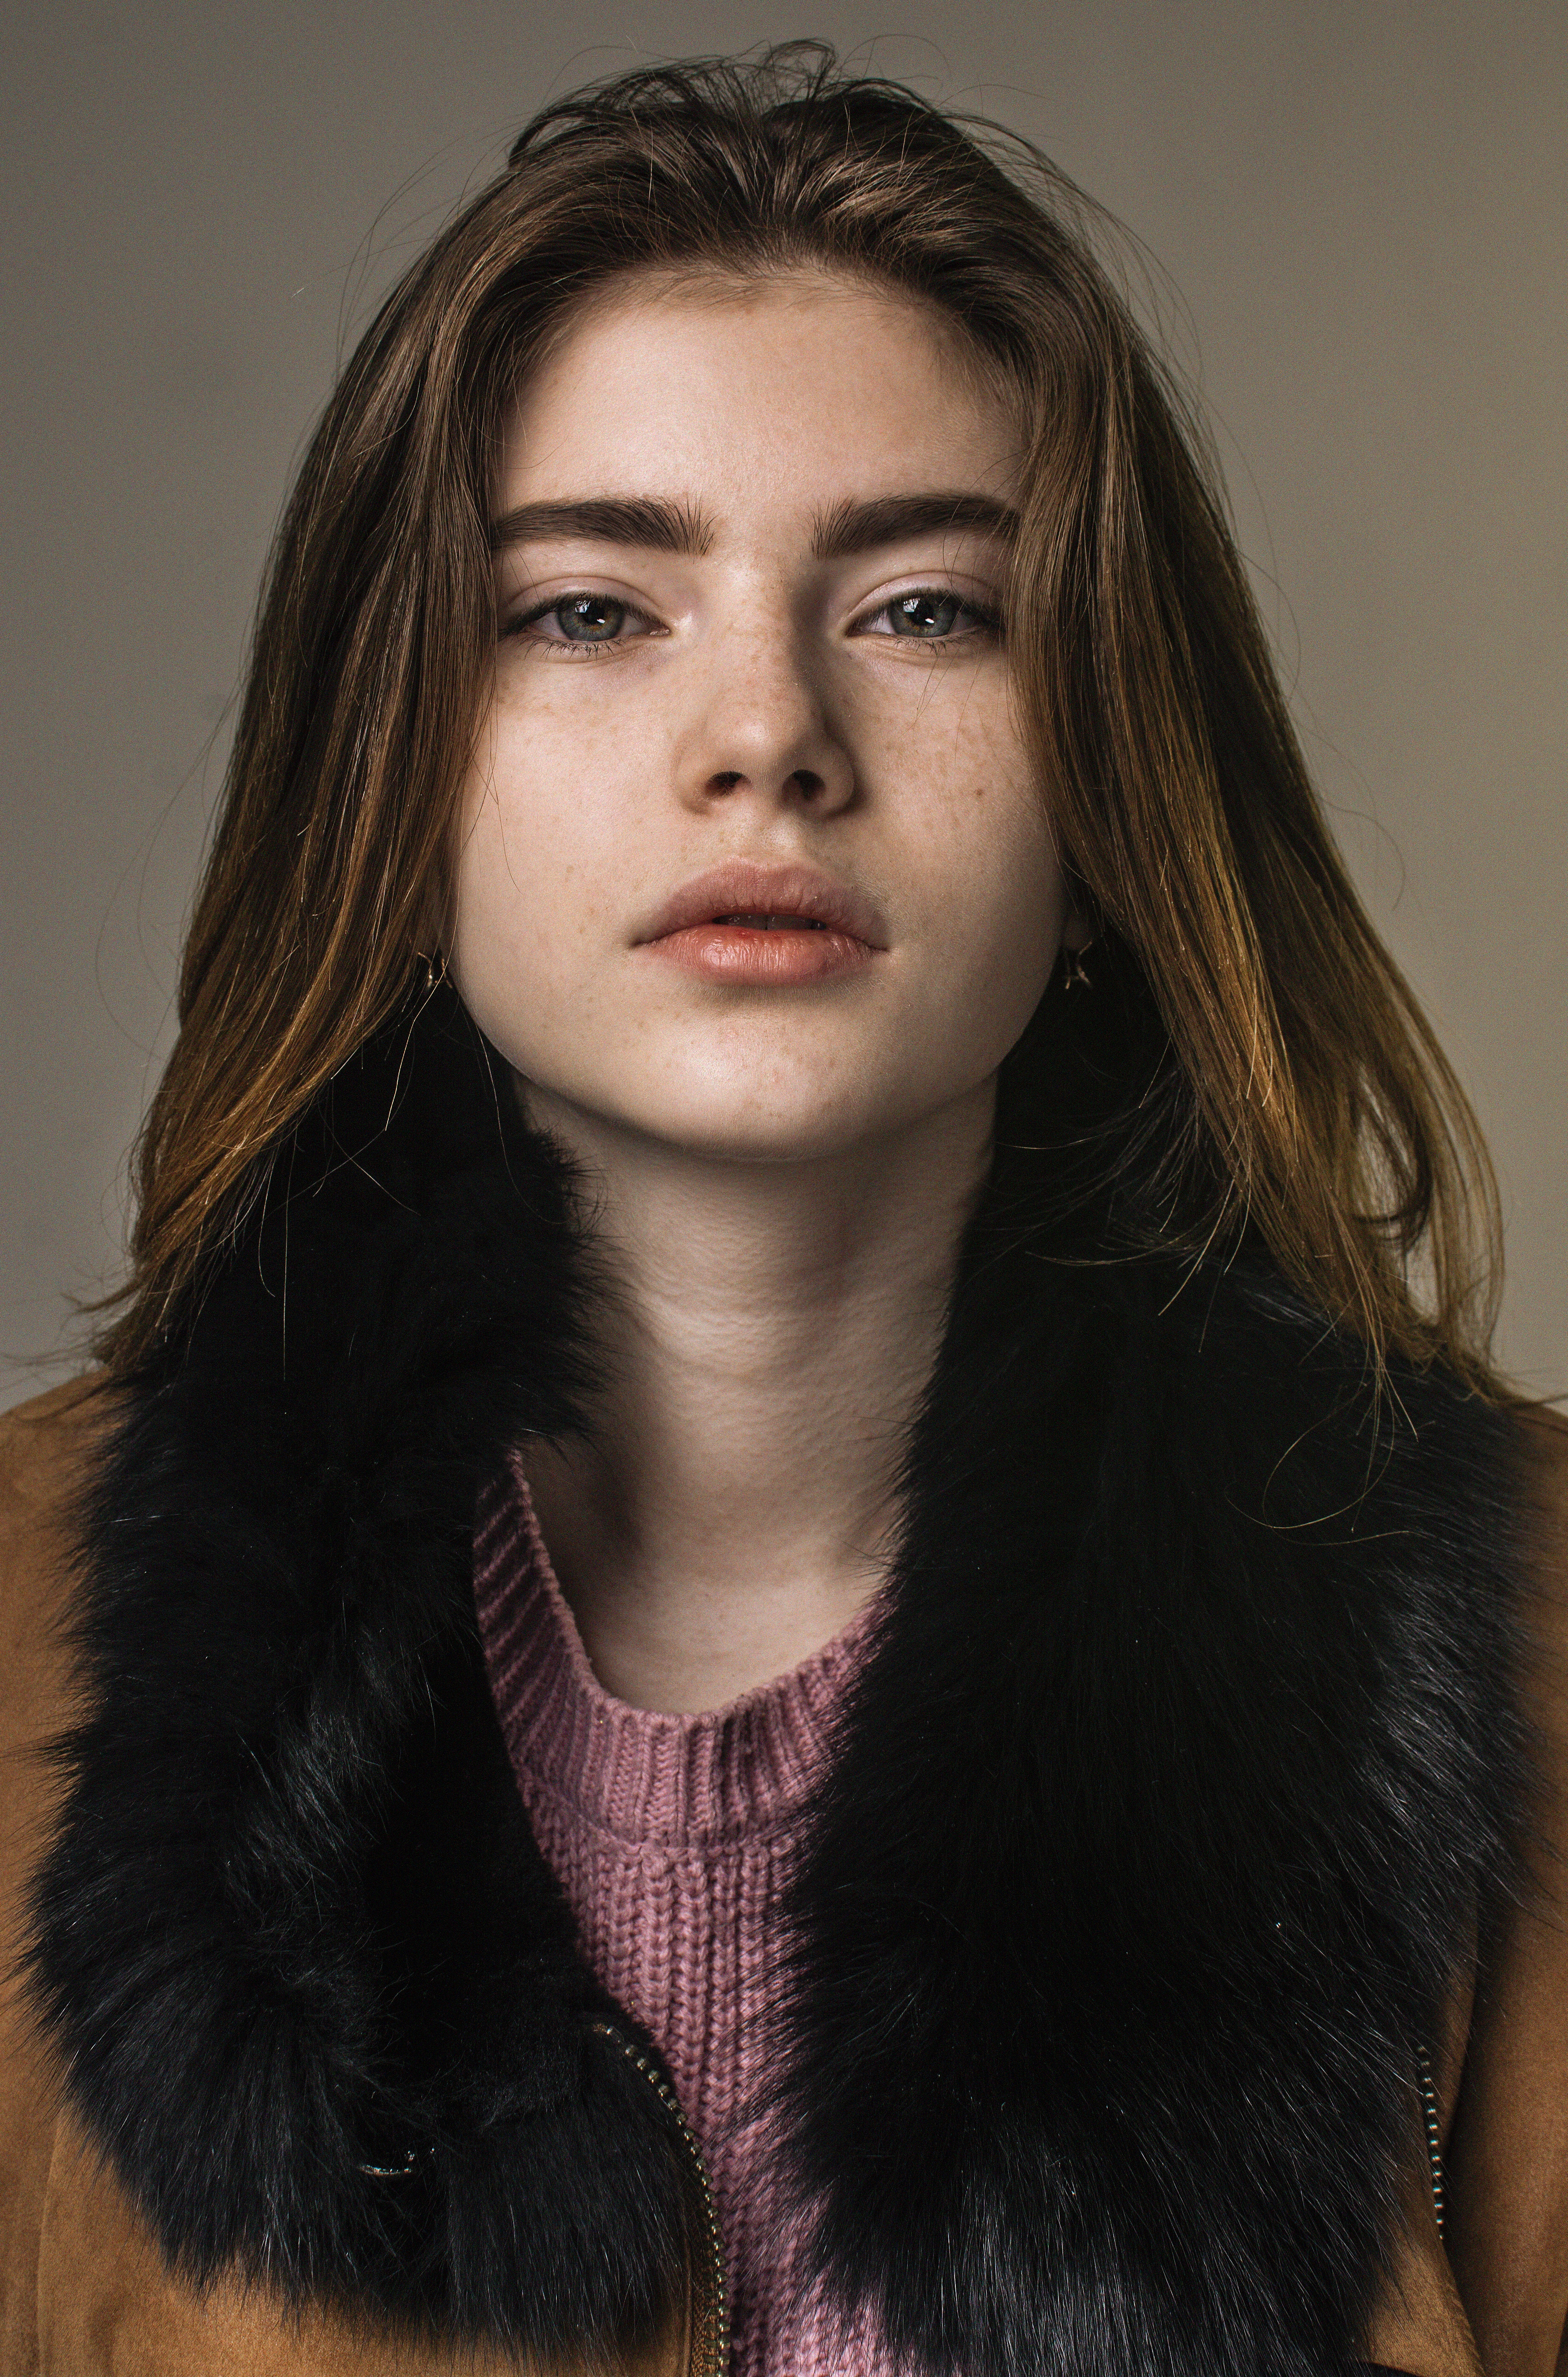
Since I didn’t want to run into any potential copyright issues, the photo I used for this particular project was pulled from Unsplash.com. A couple other sites that offer copyright free pictures include:
–Pixabay.com
–Negativespace.co
–Morguefile.com
The steps
- Select your photo. I decided to depict the main character from the novel. A close-up of the face fit how I imagined the character to look like even if the rest of the picture didn’t quite match up. But no worries–things can always be cropped later.
2. Open the photo in Photoshop and follow the steps in this video up to 1:25. I’ve also written out the steps for convenience.
a) Duplicate the photo so that you have the original photo (background layer) and copy layer. (Keyboard shortcut: CMD + J)
b) Making sure you’re working on the duplicate layer, go to “Image” (top left of screen) –> “Adjustments” –> “Black and White”
c) Duplicate your black-and-white layer again (Keyboard shortcut: CMD + J)
d) On this third layer, click on the “fx” button (bottom right) –> “blending options” –> uncheck the “R” box–> hit “okay”
e) Making sure you’re on the “move” tool (hit “V” if you’re not sure and photoshop will automatically switch you over to the proper tool), click on the image and drag the top layer sideways. This should create the classic black-white-blue-red color combo in a “glitch effect”
f) Save a “glitch scanline” image to your computer, then open up it up in the same file you’ve been working on in steps a-e. Link to free scanline downloads here (any of the scanline options will work)
g) The scanline should now be your top-most layer in the photoshop composition. Enlarge the scanline so that it covers all of your base picture.
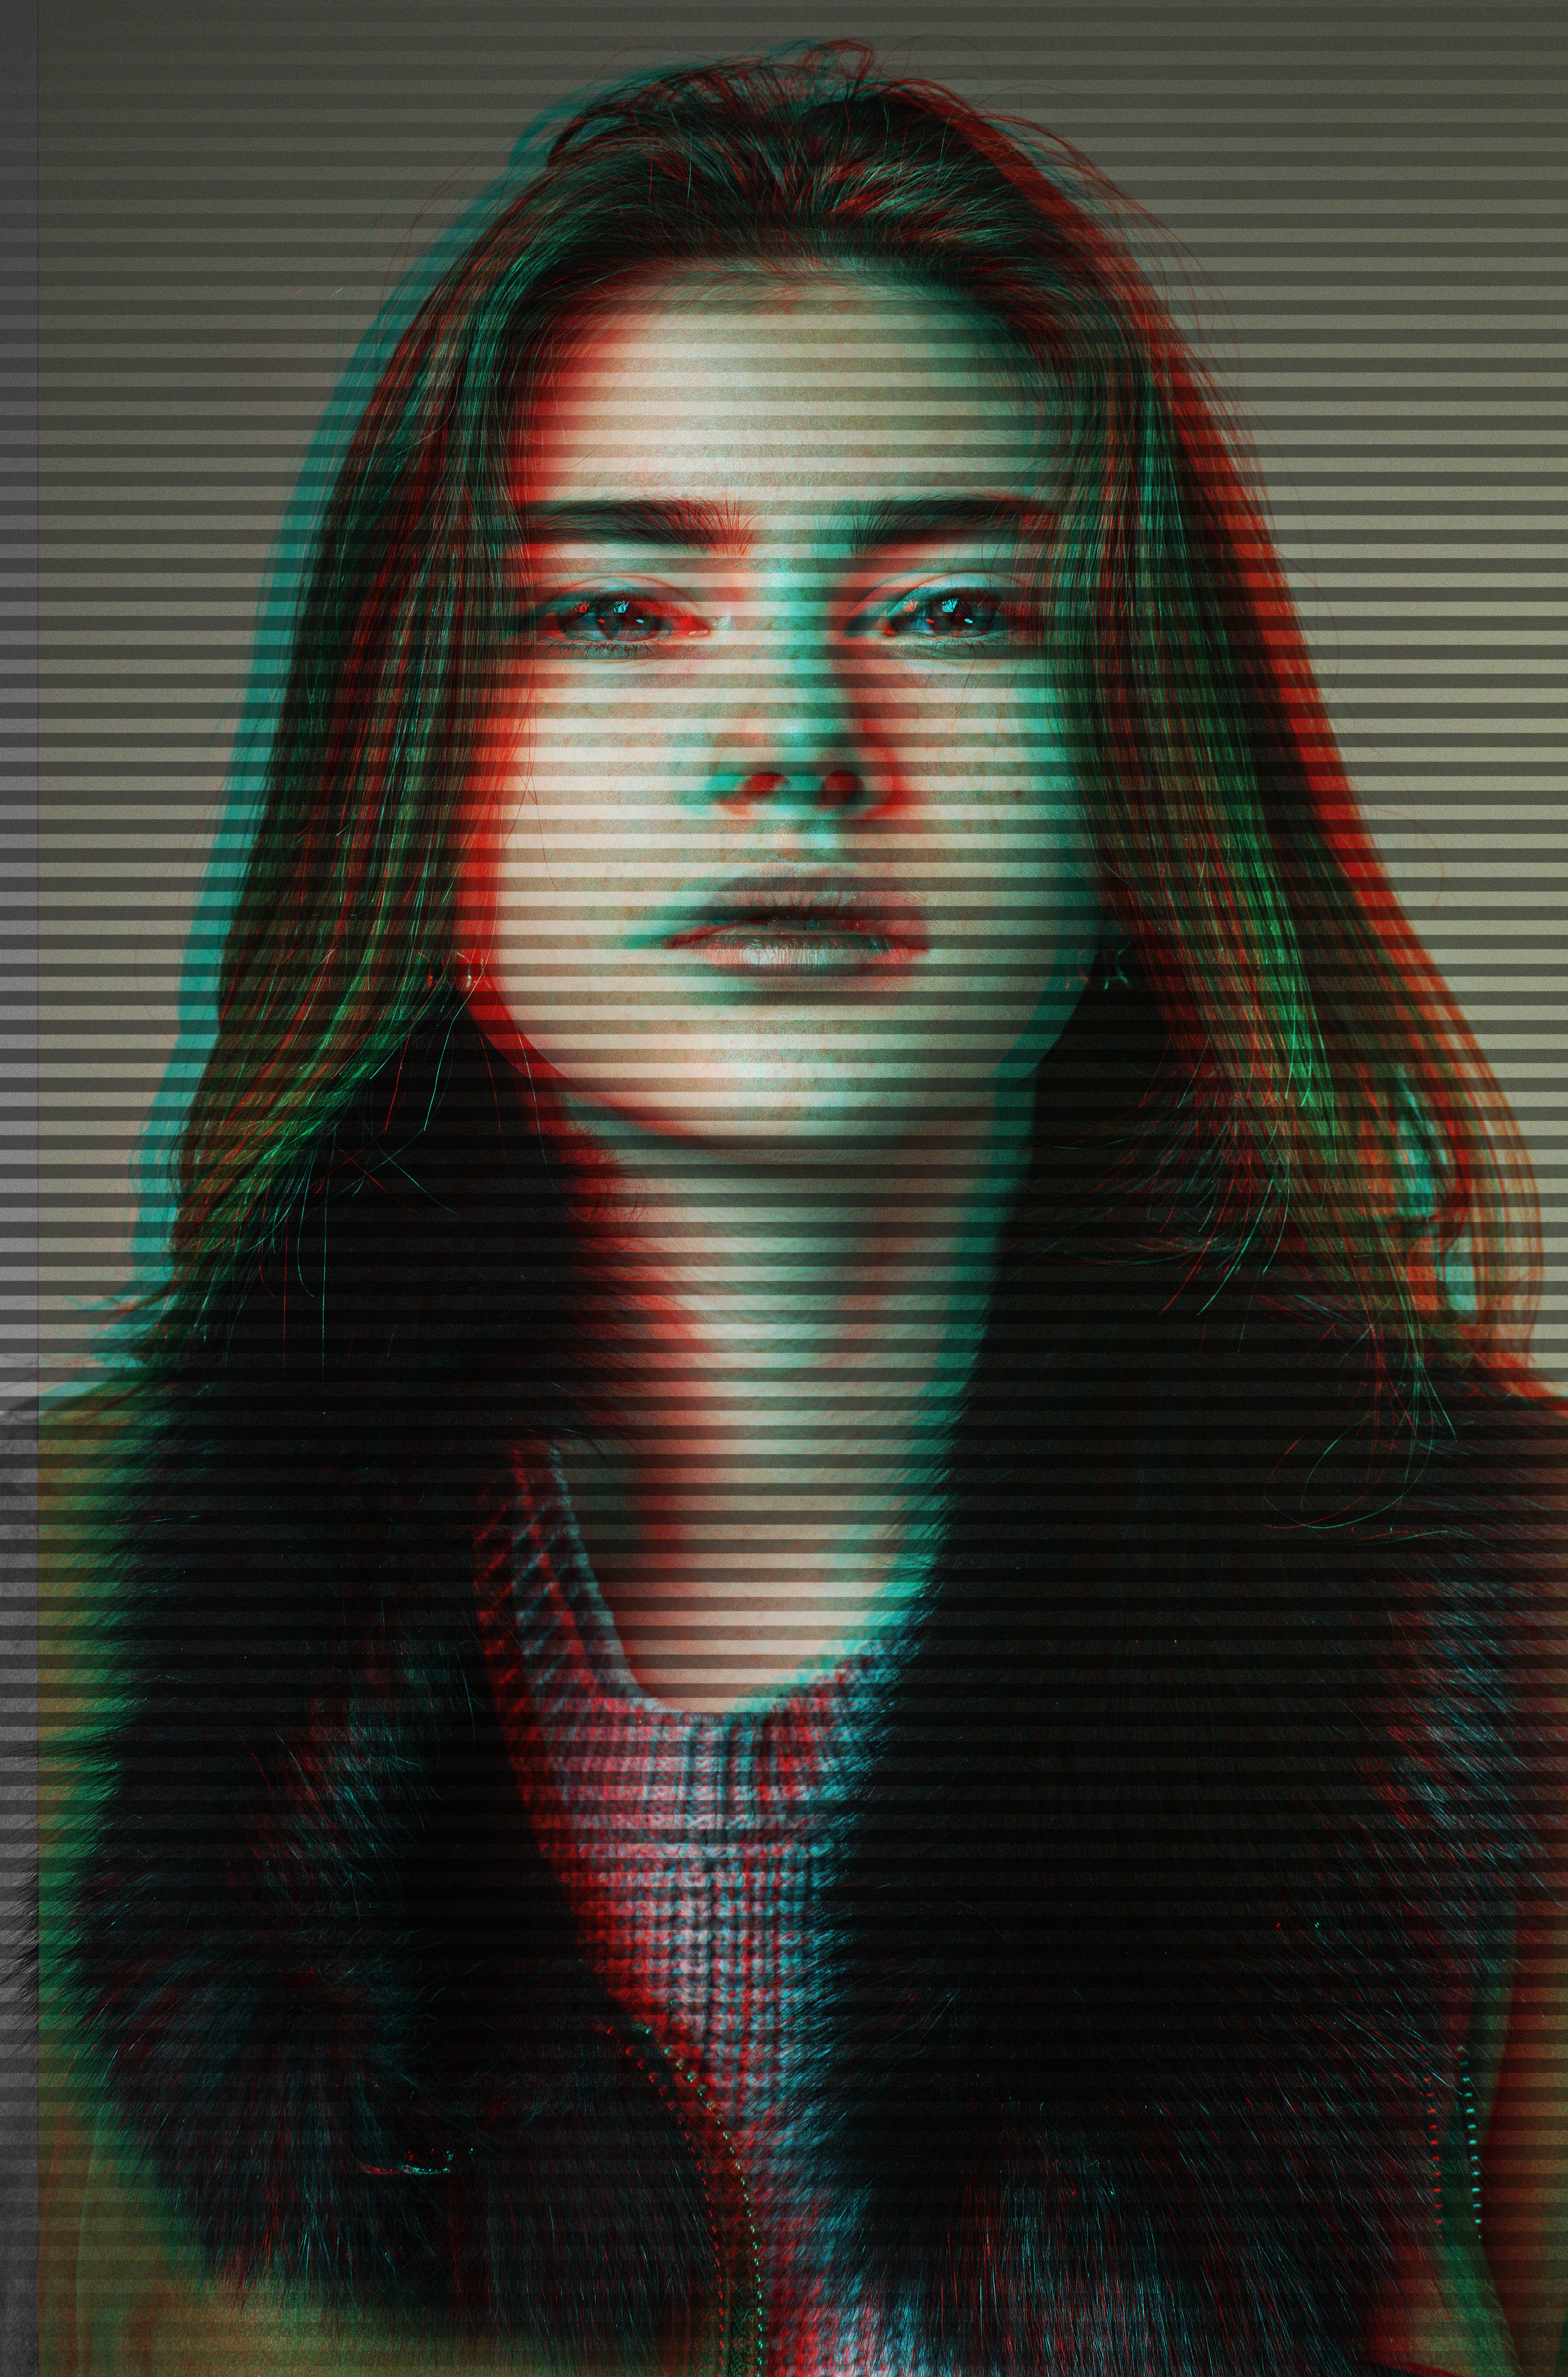
h) Under the “layer” tab, switch the dropdown from “normal” to “overlay”. Then set the opacity to 50-70%.
You should now end up with something like this:
3. Save your file as a PNG and send/airdrop/email the Glitch Base photo to your phone/iPad/wherever you downloaded the PicsArt app.
4. Open the photo in the app and scroll along the bottom until you see the “shape mask” option.
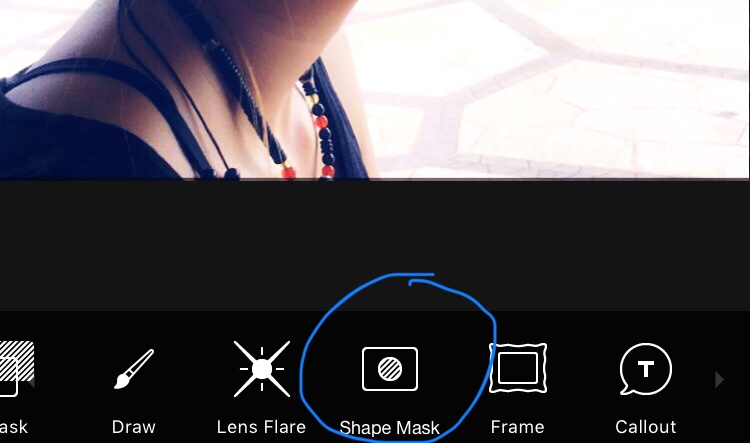
5. Tap on it. Set the opacity to 100 and pick a background color (I went with black). Now for the fun part–go through all the mask shapes and pick the one you like the most! I’ll recommend starting with a simple shape to begin with.


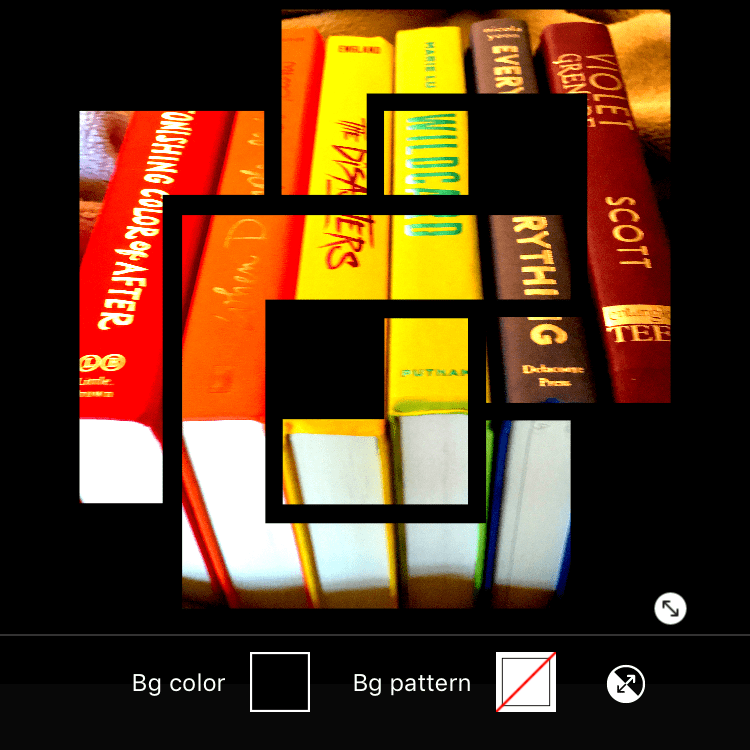

6. Since I’m a fan of the Impossible Triangle (also known as the Penrose Triangle), I naturally went with that one. Plus, it gave me a bit of a ‘sci-fi’ vibe.

7. Save your masked photo to your phone/iPad/what-have-you and then send/email/airdrop it back to your computer. Open a blank canvas in photoshop set to the size to whatever you wish your book cover to be. (I set my width = 3600 px and height = 5700 px). A good rule of thumb is a 1 : 1.6 ratio. (Ex. if the width is 1000 px, then height should be 1600 px). Make the canvas color the same background you picked in the PicsArt app (so for me, this would be black again.)
8. Drop your Masked photo into this blank canvas and resize until satisfied with its size and placement. Duplicate the layer by hitting COMMAND + J. Lock your original layer and click on the duplicate copy.
9. Going back to this lovely photoshop tutorial video, finish up the steps from where we left off up until the 3:16 mark. Again, I’ll write out the steps for convenience.
a) Making sure you’re working with the duplicate copy, select the “rectangular selection” tool and select a “glitch section” you’ll like to create on the picture.
b) Hover the mouse over the selection and hit the COMMAND button. While still hitting the command button, drag the selection to the side to create that glitch effect.
c) Hit COMMAND + D to deselect
d) Repeat steps a-c as many times until satisfied with the overall appearance
e) NOTE: a gradient is applied in the video starting at the 3:16 mark, which I chose not to use
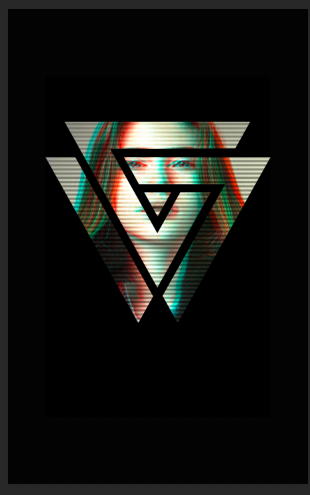
You should now have something like this:

10. Next, we’ll add an outer glow to this Glitched picture. But first, duplicate your Glitched layer once more (so that you can revert back to it in case you make a mistake later). Making sure you’re now on the new layer, select the outline of the Glitched picture. You can either use the Magic Wand tool or the Pen Tool (my preference) (both found on the left side column). You should end up with something like this, with the “marching ants” outline:

11. Go to “Layer” (top left) –> “Vector Mask”–> “Current Path”. In the thumbnail of your current layer (found bottom left), you should see a “mask” of your outline.


12. Make sure you have selected the vector mask by clicking on the right hand picture shown in the thumbnail (in my case, the black and white triangle on a gray background). Select “Layer” (top left) –> “Layer Style”–> “Outer Glow”
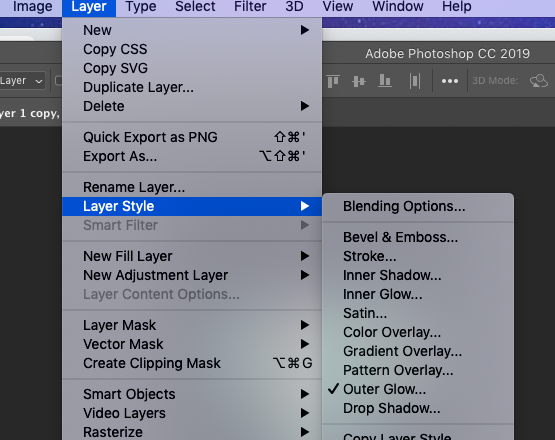

Pick a color you want the glow color to be. Feel free to toggle around with the various setting options (spread, range, opacity, etc) until you are satisfied. I chose a nice cyan blue (again, going for that techy-sci-fi vibe), opacity 46%, “softer” technique, 13% spread, 59 px size.) Then hit “OK”. You should now have something like (note: I ended up wanting a cleaner edge with the triangle, so re-did some of the steps in step 9, hence the slight difference between pictures):

If you’re satisfied, skip ahead to the next step in Part 2. For me, I wanted a stronger glow effect. Thus, I once again duplicated the layer I was working on (CMD + J) and ended up with this:

To be continued
Alright, sweet, now you have a cool looking glitch-y-sci-fi-tech-y photo with a glow! My next post, aka PART II, will cover how to paint a cool nebula onto the background and font treatment for the title, so be sure to stay tune 🙂


2 thoughts on “PART I: How to Make a Simple Sci-Fi Book Cover (for the photoshop challenged)”